BEFORE What the summerhouse looked like when we bought the house, basically a storage shed/cabin with leaky roof and hideous 1970 lino flooring, surrounded by brambles and overgrown trees.
AFTER It only took me two summers and lots of hard work to trim the garden, restoring it to its original beauty - hope Mr G. (RIP), the botanist who owned it, approves. I used Forest Green fencing paint and domestic paint inside. Most materials are recycled, I kept new purchases to the minimum. My partner re-roofed it and put a shelf up, I did the rest.
 |
| Owl and pussycat theme and rudely shaped seashells |
 |
| Dinky toys and other toy collectables |
 |
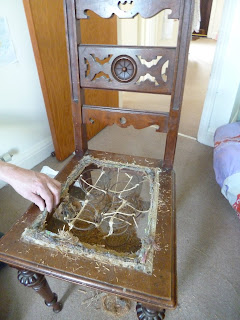
| I restored and re-upholstered this 1940 utility chair and made the William Morris hanging using Sanderson's reproduction fabric swatches I did try to ask for sponsorship, product review opps from major DIY chains but it was too much of a hassle to pester them after initial zero replies so I bought well-priced items from B&Q, Screwfix, Homebase, John Lewis and used materials and items I have collected in the past 19 years. DIY PRs eat your heart out! More photos to come in future posts. My original inspiration and photos of the garden
My inspiration, a wonderful Victorian-style cabin in the US, is the labour of love of Sandy Foster, which was featured in the NY Times in 2010. I contacted Sandy through her blog a few years back and praised her excellent taste. I read she is taking a break from blogging at the moment, but you can see some wonderful pictures here.
But back to my wonderful garden. For those who were skeptical about me tackling the jungle we bought alongside the house, I did it mostly by myself using a pick axe and gardening tools - I didn't employ anybody with a chainsaw as somebody hinted. My partner tackled the tall trees with a forestry saw (I'm 5ft 2in and weedy, so not up to that).
Sadly Alan Titchmarsh didn't reply to my request for help (or more likely the TV producers), which is a pity as I haven't still identified some of the rare plants I have got. I had the pleasure of editing his copy when I was freelancing at Gardeners' World and let's say his articles needed minimal changes. I wasn't surprised when he started writing novels. Back to the garden, I'm no botanist like the previous owner, Mr. G, who used to grow orchids in the greenhouse at the back. He worked for the University of Cambridge and I found his academic papers online. I also found some weird items in the garage, which I'm hoping to show off soon and lots of gardening products that I had to discard because they are now probably banned (aka strong weed killers that smelled like paint stripper). He was an experimenter and also used organic methods, which were not fashionable back then.
But with no further ado, here are photos of the garden, introduced by my constant friend, the robin, which is very tame.... We do get quite a lot of wildlife in the garden, my partner spotted a heron, because we have a pond and very tall, mature trees. We have a whole wall of holly on one side, but I have seen very few berries at Xmas as the birds scoff them.
Summer 2011
June 2013
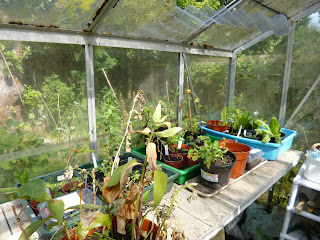
Yes, I know, the pond needs cleaning, my partner and I did it after taking these pics. There is lots of grass! It takes me two hours to cut it and trim the borders. What about the back of this garden? Not many people realise that the garden goes on after the summerhouse, through a jasmine archway. It's also much wider than it looks on the pics, I couldn't take it all in so the flower borders and the massive wall of holly are missing from the main picture. The back, pictured below, was Mr G.'s vegetable patch and experimental ground. We still have his greenhouse but it will need replacement as it's falling apart. We built the raised beds you see with the running beans crawling up bamboo sticks, some sourced from the garden as we have a big bamboo patch by the pond. The apple tree above (it got trimmed so a bit forlorn looking) offers some unusual apples, nobody so far has been able to tell me what variety it is. Mr G. lived in the house when there was still rationing after WW2, so he was growing plenty of fruit and veg. He was digging for victory for sure! When I reduced the amount of brambles - I kept those he planted by the fences and the greenhouse - I found rhubarb, asparagus, several apple trees (some espalier style), a stray spring onion and also realised he was growing weeds that had organic purposes (such as nettle, good for the compost heap). We removed the original compost heap as it was falling apart to create the raised beds. We do have a compost heap in a corner and we have kept all his water buts, which make watering the garden easier and eco-friendly. That's it for now. I will take more photos. |


